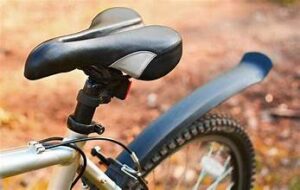
If you’re a cyclist, knowing how to clean your bike properly is just as important as riding it. Whether you’re a commuter, mountain biker, or road cyclist, keeping your bicycle clean will improve its performance, extend its lifespan, and help you enjoy smoother rides.
In this guide, we’ll break down the best way to clean a bicycle—from basic supplies to detailed step-by-step instructions. No matter your level of experience, these bike cleaning tips will help you maintain a sparkling, well-functioning ride.

Why You Should Clean Your Bike Regularly
Cleaning your bike isn’t just about appearance—it’s about performance and safety. Dirt, grime, and moisture can build up on your drivetrain, frame, and brakes, causing premature wear and reduced efficiency.
Here are a few key benefits of regular bike cleaning:
-
Improves bike performance
-
Increases lifespan of components
-
Prevents rust and corrosion
-
Reduces costly repairs
-
Keeps your ride smooth and safe
Experts recommend cleaning your bike after every few rides, or more frequently if you ride in wet, muddy, or dusty conditions.
What You’ll Need to Clean Your Bike
Before you start cleaning your bicycle, gather these essential supplies:
-
Bucket of warm water
-
Mild soap or bike-specific cleaner
-
Sponge or soft cloth
-
Soft-bristled brush or old toothbrush
-
Chain cleaner or degreaser
-
Chain cleaning tool (optional)
-
Bike chain lubricant
-
Clean rags or microfiber towels
-
Hose or spray bottle (low pressure)

Avoid using high-pressure hoses, which can force water into your bearings and damage components.
Step-by-Step Guide: How to Clean Your Bike
Step 1: Set Up Your Workspace
Choose a well-ventilated area like your driveway, backyard, or garage. Use a bike stand if available, or flip your bike upside down resting on the saddle and handlebars (preferably on a towel or mat to protect the seat).
Step 2: Rinse Off Loose Dirt
Use a low-pressure hose or spray bottle to gently rinse off loose dirt and debris from the bike frame, wheels, and drivetrain. Avoid aiming water directly at the hubs, bottom bracket, or headset to prevent damage to internal bearings.
Step 3: Clean the Drivetrain
The drivetrain (chain, cassette, derailleurs, and chainrings) is the dirtiest part of your bike and requires special attention.
-
Apply bike-specific degreaser to the chain, cassette, and derailleurs.
-
Let it sit for a few minutes to break down grease and grime.
-
Use a chain cleaning tool or an old toothbrush to scrub the chain links.
-
Wipe the cassette and chainrings with a brush or cloth.
-
Rinse with water to remove all degreaser and gunk.
Pro Tip: A clean drivetrain shifts better and lasts longer. Make this part of your routine maintenance.
Step 4: Wash the Frame and Wheels
Mix warm water with mild soap or bike cleaner in your bucket.
-
Dip a sponge or cloth into the soapy water.
-
Gently scrub the frame, working from top to bottom.
-
Wash the forks, seat post, handlebars, and other components.
-
Use a separate brush to scrub the tires and rims, removing mud or sand.
Be careful around sensitive parts like disc brakes and bearings.
Step 5: Rinse and Dry
Once you’ve washed the entire bike, give it a gentle rinse using clean water to remove any soap or degreaser residue.
Next, dry your bike thoroughly using a clean microfiber towel. Pay extra attention to areas where water can collect and cause rust, such as:
-
Bottom bracket
-
Rear cassette
-
Chain
-
Bolts and joints
Let it air-dry completely if possible, or use compressed air for hard-to-reach areas.
Step 6: Lubricate the Chain
Now that your chain is clean and dry, it’s time to re-lubricate it.
-
Choose a bike-specific chain lubricant (wet or dry lube depending on your riding conditions).
-
Apply a single drop to each chain link while rotating the pedals backward.
-
Let the lube settle for a few minutes.
-
Wipe off any excess lubricant with a clean rag to prevent dirt build-up.
Avoid over-lubing, which can attract dirt and grime.
Step 7: Final Check
Once your bike is clean and lubricated, take a few minutes to:
-
Check tire pressure
-
Inspect brake pads
-
Test gear shifting
-
Look for any loose bolts or signs of wear
Regular inspections help you spot issues before they become serious problems.
Extra Bike Cleaning Tips
To get the most out of your cleaning sessions, keep these tips in mind:
-
Clean your bike more often in bad weather
-
Use separate tools for the drivetrain and frame
-
Don’t use household degreasers like WD-40—they’re not designed for bikes
-
Store your bike in a dry place to prevent rust
-
Keep a bike maintenance log to track cleaning and service
Conclusion: Keep Your Bike Looking and Riding Like New
Learning how to clean your bike is one of the most important skills for every cyclist. Not only will your bike look great, but it will also ride smoother, last longer, and cost you less in repairs over time.
By following the simple steps in this guide, you’ll keep your bicycle in top condition all year long. Just remember—consistency is key. Make cleaning your bike a regular part of your cycling routine, and you’ll thank yourself later on the road or trail.